When it comes to customizing your motorcycle, there is no
greater satisfaction than doing it yourself. The majority of custom aftermarket
parts are direct replacements of the stock piece. Much of your customizing will
be as easy as unbolting the stock part and bolting on the new part. But with
any mechanical job, there are guidelines and specs that you must follow to
safely installing your parts and making sure your motorcycle is roadworthy.
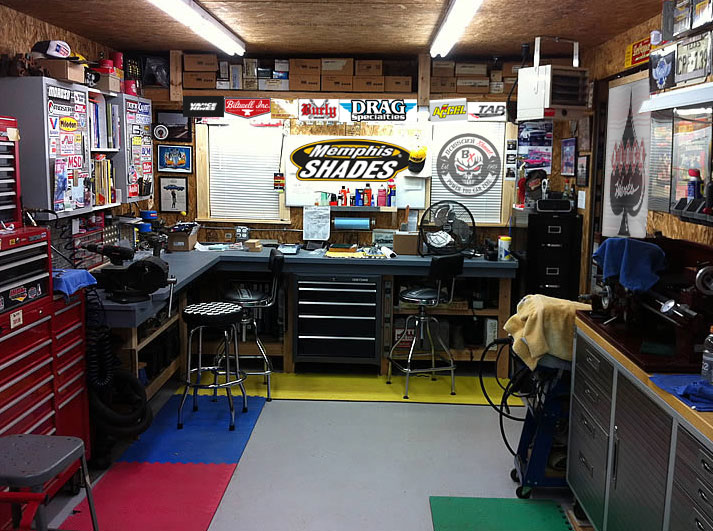
Work SpaceThe proper work space will help you be more organized and
will keep things from getting lost or misplaced. Giving yourself an
uncluttered, well lit work space will help the wrenching go a lot smoother. If
you do not have a lift to get you motorcycle up off of the ground, a center
stand jack will set your bike upright, making it easier to work on the left
side. Make sure you secure your motorcycle to prevent any falls. Set yourself
up with a container to put small hardware in, maybe a few if it’s a big job. Have
a place you can safely lay and store chrome or painted parts. Make sure your
workspace has ventilation if you’re using solvents, cleaners and spray paint.

Procure All of Your Parts Before You StartThere is nothing worse than disassembling your
motorcycle, just to find out your new replacement parts are held up for some
reason. Back orders, lost packages, shipping delays and theft play a part in
that scenario every day. Gather all of your parts and inspect them before tear
down. If you find a damaged part and you need to exchange it, the process can
add weeks to your project to get the proper replacement. Also make sure you
have all of the right gaskets, o rings and fluids to finish your project.
Proper toolsInvesting in the proper tools will not only speed the
installation process up, but will keep the components you’re installing looking
good. Using the wrong tools can cause the rounding off of bolt heads and
stripped screw heads. Your tool box should have a full complement of metric and
standard sockets and wrenches. Allen bolts are common on many motorcycles but
have been replaced by Torx® head fasteners as of late. All of you tools need to
be in good condition to keep from marring or damaging your new parts as you
assemble them. Both foot pound and inch pound torque wrenches should be in your
tool box to insure your parts are properly tightened. Loose parts fall off.
Over tightened parts break, then fall off. Blue LocTite® is also a must to have
on hand as double insurance your fasteners won’t come loose. Use the Red
Loctite® if you never want the part to come off again. Protecting your parts
during installation and your motorcycle is important so no finish gets
scratched or chipped. Painter’s “Blue Release tape” is nice to wrap around
chrome parts to keep your parts from damage, plus it’s easy to remove when you are finished.

Service Manual A factory manual will tell you everything you need to
know about your motorcycle. You will get proper procedure on disassembly and
assembly, capacities and torque specs. Your torque wrench is useless without
knowing the correct torque spec.
Safety Before beginning any mechanical work, be sure to wear eye
protection. You only have 2 eyes and if you lose one, half of your vision is
gone in an instant and you probably won’t be able to ride anymore, so do it!
Mechanic’s gloves are a good idea, keeping carcinogens off of your skin and
protecting you from abrasions. (Side note: remove all jewelry and watches
before beginning work to avoid scratching or marring of chrome or painted
parts). Always keep an A/B/C rated fire extinguisher nearby just in case
something sparks a fire. Keep some Speedi Dry or it equivalent in case of oil
spills.
CleaningAfter installing your aftermarket parts on your
motorcycle, be sure to clean off and grease, oil or any finger prints. This is
especially true with exhaust systems. If you start a motorcycle with
fingerprints all over it, the prints will burn into the chrome and will be
forever a part of your motorcycle.